Refurbishing Old Sewing Machines
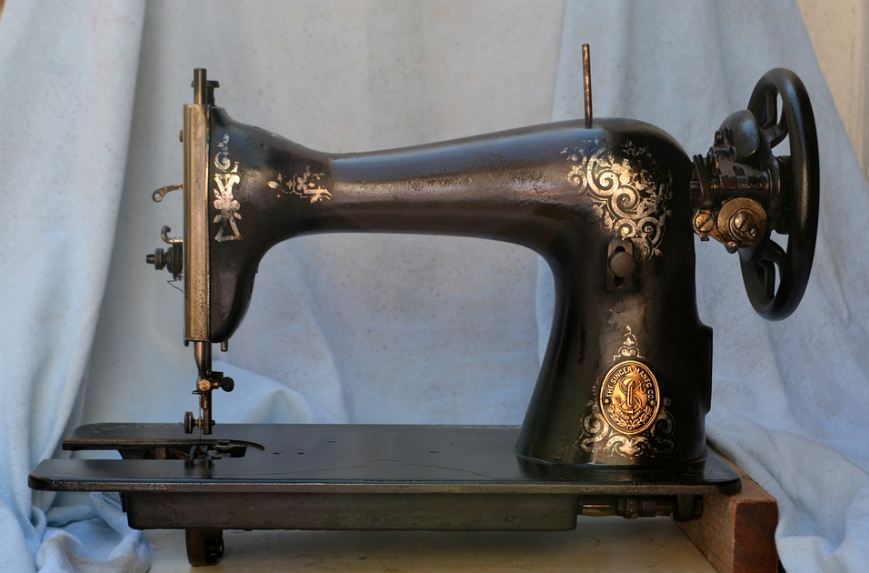
Have you ever seen a vintage sewing machine at a thrift shop or a flea market that made you stop in your tracks and take it home for repair? You may have seen its beauty under all that rust, dirt, and grime but aren’t sure what it will take to bring it back to its former glory.
If you like to sew or are simply fond of refurbishing antique items, there’s a special satisfaction that refurbishing a vintage sewing machine can bring. The craftsmanship, simplicity, and ornate details of vintage sewing machine lures those who like the simpler times, and an old sewing machine that still works can be a treasured possession.
Different machines may need other ways on how to repair them, and you might need to replace spare parts compatible with the specific model you have. But in general, there are some things to keep in mind when refurbishing old sewing machines.
Things to Inspect
If you have a working knowledge of sewing machines, you know what to check with an old machine so you can know where it needs repair. Here’s a checklist of the things to inspect:
- Turn the handwheel and check if it moves freely. Listen to the sound – note if there are any grinding noises when the handwheel turns.
- Examine the power cord and look for signs of brittleness and cracks.
- Tilt the machine back from the cabinet and check the working mechanisms on the underside of the machine. See if it’s dry or has been recently greased. This is where you can guess whether the machine was used recently and if so, it’s probably going to work okay.
- Check if it works when the machine is plugged.
- Flip the light switch and see if the light turns on.
- Check if the motor runs after you pull down the knee lever. Does it sound right, or do you hear popping sounds?
Once you see that the machine works (or can still work after oiling, cleaning, or replacement of some parts), it’s worth purchasing since it’s not yet beyond repair. After that, you have to check these things as well:
- Make sure the decals aren’t scratched up and missing altogether.
- Inspect the engraved parts.
- Make sure the serial number in the machine is still legible.
- Check the cabinet for scratches, dings, and general stability.
- Take off the seat cushion to see if any of the original parts are still in there.
- Open the drawers to look for parts and check if the hinges are still okay.
Tools Needed
Now that you’re ready to restore and refurbish an old sewing machine, make sure you get these things ready:
- Small flashlight – for illuminating dark and tiny places where conventional lights won’t reach.
- Magnifying glass – for checking interior parts
- Small paintbrush – for removing lint from the bobbin, shuttle area, and in other little nooks and crannies of the machine
- Small screwdriver – for removing screws. Some machines come with special screwdrivers included – but if you don’t have a screwdriver with the machine, a standard 3mm-wide, flathead screwdriver will work.
- Bowl or plate – for housing any screws, nuts, bolts, plates, etc. that you will remove from the machine as you restore. Make sure to put a cloth or piece of batting so metal parts don’t move around too much and get lost. It helps if you have a mechanic’s magnetic bowl from a car parts store.
- Tweezers – for pulling out stray bits of thread or spools of dirt from the bobbin area or elsewhere in the machine
- Syringe – for distributing oils into the smallest areas
- Rags, Q-tips, pipe cleaners, microfiber cloth, and paper towels – for general cleaning purposes
- A stable work surface – for ensuring you can work effectively and safely
- Old towel, cloth, or old shirt you will not use – for blotting out any oil that may drip out
Safety Issues you Need to Be Aware of
Before you start restoring an older machine, here are some safety issues that you must be aware of.
- When restoring an old machine, you will be in contact with sharp edges, electrical power, and messy solvents. Ensure that you take the necessary precautions to ensure you will safely do the refurbishing.
- Keep your work area ventilated.
- Lubrication is a big part of refurbishing old sewing machines, so it is important to know where to apply oil and where to apply grease. Generally, oil goes anywhere that needs lubrication, while grease is for gears. Do not put oil on the motor or on the gears.
- Make sure you’re dressed appropriately. As much as possible, don’t wear any clothes that you won’t like to get stained with grease, so your favorite shirt is out of the picture. An old shirt is the best attire. You may want to wear an old apron as well to protect your clothing.
- Work in an area that can handle stains. It’s best to do this work in the garage. If you don’t have any space in the garage, protect the flooring in any area you decide to work in.
- Unplug your sewing machine from the wall socket before doing any work.
- If one part or component is not working and you’re unsure how to repair it, save yourself some trouble and bring it to a repair shop. It’s no use risking damage or accident with the machine.
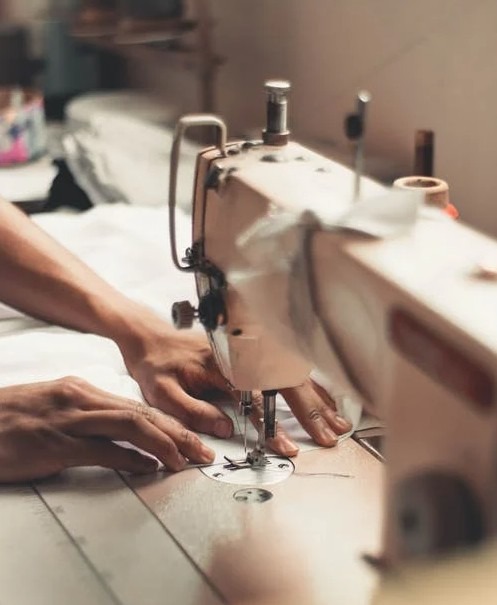
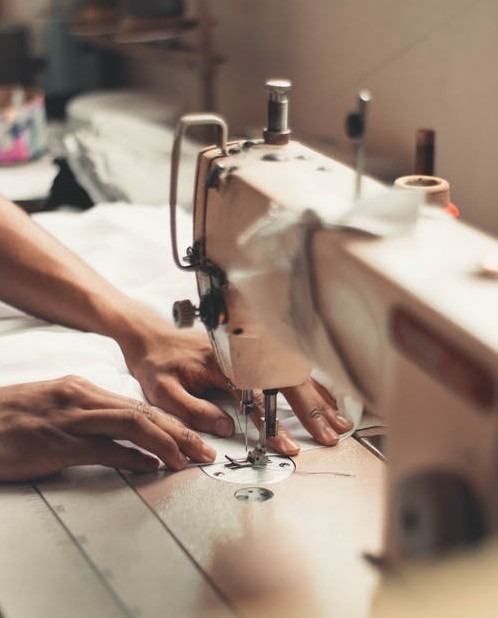
Cleaning the Machine
After you bring your machine home, your first task is to give it a bath.
Then, clean the mechanical parts on the interior of the machine first, then the body of the sewing machine. After that, clean the metal pieces to avoid smearing them with oil after cleaning.
Start cleaning by removing any thread from the machine. Take off the bobbin and the spool of thread and the bobbin case if it’s removable. Remove any metal parts before cleaning – the faceplate and the needle plate of the machine can be removed so you can clean them separately. Remove the needle bar screw, the foot, and the cutter, if possible. Lay them out on an old towel and place any screws and small parts in the bowl you prepared. If you can’t remove it, clean it in place while being careful to avoid getting the metal polish on the machine body.
If the screws are not turning, soak it and the area around it with a sewing machine oil or Tri-Flow Superior Lubricant . Screws are typically stuck after years in storage, and a little oil can loosen it up.
The machine itself can be dusty, so wipe it down with a damp microfiber cloth. You can use simple dish soap and warm water, but make sure the cloth is simply damp, not wet. If you use dish soap, clean it off with another damp cloth.
The bobbin area, located beneath the needle bar and presser foot, needs to get cleaned. Remove or open up the slide plates or needle plates, remove the needle bar and needle, and get rid of any stray threads and lint. Check the bobbin area for stray threads – you may need a magnifying glass or flashlight for this. If there’s a piece of red felt inside the bobbin area, don’t remove it. Later you will need to apply oil to it after the machine has been cleaned.
For the wooden portion of the machine, a bucket of warm water and Murphy’s Oil Soap will be enough. Wash down the surface itself, the entire cabinet, seats, and even the vinyl cushion cover.
Oiling the Machine
After cleaning the machine, you need to oil it. This is an area where vintage machines differ from modern ones – the older machines are thirsty and needed to be oiled frequently. You must only use good quality oil for your machine like the Tri-Flow Superior Lubricant . You don’t need to apply a lot of it – a drop or two will be fine.
Refer to the manual to see what parts needed to be oiled, keeping in mind that you must oil in areas where there is movement or where there are two parts that move against one another. Have a paper towel underneath the area to catch drips and avoid it from ruining your work surface or floor.
After oiling, wait for a bit before using it to sew to avoid getting oil on the project you’ll be working on. Place a paper towel underneath the presser foot and needle bar and leave it there for a few hours.
Restoring and Repairing the Machine
There are different areas in the machine that may need repair. Vintage sewing machines are mostly mechanical, so even one that looks like junk can be refurbished with a few simple repairs. If you’re not an electrician or a sewing machine repair expert, buy machines that only take a minimum of effort to get them back to work. If there’s a component that you don’t feel comfortable repairing, it’s best to take it to a repair shop to prevent further damage.
The major areas that typically need repair with old sewing machines include wires for machine and lights, wires that connect to the power source, and wiring for the knee controller or foot pedal. For other parts, it may need replacement, especially if it’s heavily damaged. Often, the wires are very degraded that it’s better to replace the wiring. If the motor is damaged, you will either have to take it to a repair shop or buy a replacement. It’s possible to repair the motor yourself, but it’s not an easy task, especially if you haven’t done it before.
One area that often needs repair on an old sewing machine is the bobbin winder tire. These often become cracked or hard over time. But this part is easy to repair. You can order a new bobbin winder tire online. All you have to do is to remove the old bobbin winder tire with your fingers or some pliers, but sometimes, you have to cut it to remove it. Then, just roll the replacement, and you’re finished.